


By now, you should already have heard of Microsoft’s new Windows Phone 7 mobile OS. And while many developers are busy developing for Android and iPhone, Microsoft is hard at work, developing its killer mobile OS that could give the competitors a run for the money. Before you dismiss Microsoft as a serious contender in the mobile space, think again. The new OS is now a total rewrite of the older Windows Mobile platform, and sports many features that you have come to expect of a modern mobile operating system.
In this series of Windows Phone 7 articles on mobiForge, I will bring you on a development journey to explore the full capabilities of the new operating system. And in this first installment, we will explore the tools and see how you could start writing your first application quickly.
The Tools
If you have ever developed for Windows Mobile, or Windows applications in general, you would be familiar with Visual Studio. The good news for aspiring Windows Phone developers is that things have not changed much – you would still use the familiar Visual Studio for developing your Windows Phone applications.
Microsoft has packaged all the various tools you need for Windows Phone development into a single tool – the Windows Phone Developer Tools (downloadable from http://www.microsoft.com/downloads/en/details.aspx?FamilyID=04704acf-a63a-4f97-952c-8b51b34b00ce&displaylang=en). This is a web download that installs all the required components onto your machine. For those of you who prefer an ISO image so that you can copy and install on several machines, download the ISO image from http://go.microsoft.com/fwlink/?LinkId=201927.
The Windows Phone Developer Tools includes the following:
- Visual Studio 2010 Express for Windows Phone
- Windows Phone Emulator Resources
- Silverlight 4 Tools For Visual Studio
- XNA Game Studio 4.0
- Microsoft Expression Blend for Windows Phone
Getting Started
If you have all the tools installed, it is now time to get the Windows Phone engine roaring! Before you do that, understand that there are two types of Windows Phone applications that you can develop – Silverlight and XNA. If you are developing games, XNA would be the type that you would need to learn, while for the rest of the world, Silverlight would be the one. At this moment, only the C# language is supported. (Microsoft does have support for VB programmers, but at this stage it is still a CTP release – http://www.microsoft.com/downloads/en/details.aspx?FamilyID=a808a69d-6119-47b7-b858-262be5c49915). For this article, I am going to focus on developing Silverlight Windows Phone applications.
Launch Visual Studio 2010 and create a new Silverlight for Windows Phone project (Windows Phone Application) and name it as HelloWorld (see Figure 1).
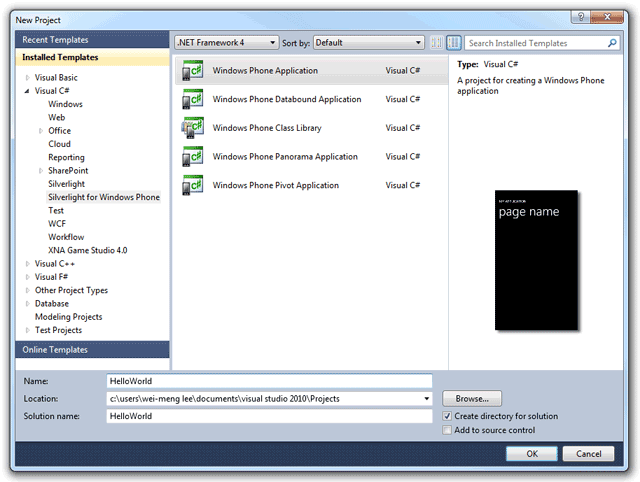
Figure 1. Selecting the various projects template for Windows Phone 7
You will see that a Windows Phone Application project is now created (see Figure 2).
Figure 2. A Windows Phone project in Visual Studio 2010
Observe the content of the Solution Explorer (see Figure 3).
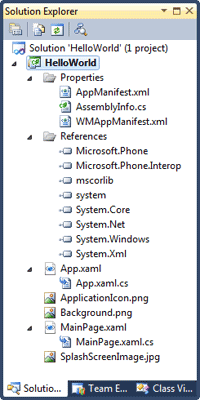
Figure 3. The files inside a typical Windows Phone application project
Here are the uses of the various important files inside your project:
- AppManifest.xml – application manifest file used for generating the XAP (application package) file.
- AssemblyInfo.cs – configuration file containing information for the assembly, such as title, description, company, GUID, etc.
- WMAppManifest.xml – contains manifest information for the application, such as application capabilities, background image, etc.
- App.xaml – contains configuration information for the entire application, such as event names for the application life cycles, resources, etc.
- App.xaml.cs – code-behind for the App.xaml file. This is where you implement the various methods to handle the application’s life cycle.
- ApplicationIcon.png – the icon that is displayed when you install your application on the phone.
- Background.png – the image to display when your application is “pinned” to the Start screen.
- MainPage.xaml – the main page to load for your application.
- MainPage.xaml.cs – the code-behind for the main page of your application.
- SplashScreenImage.jpg – the splash screen that will be displayed when you first start your application.
Press Ctrl-Alt-X to reveal the Toolbox (see Figure 4). The Toolbox contains all the controls that you can use to populate the UI of your application.
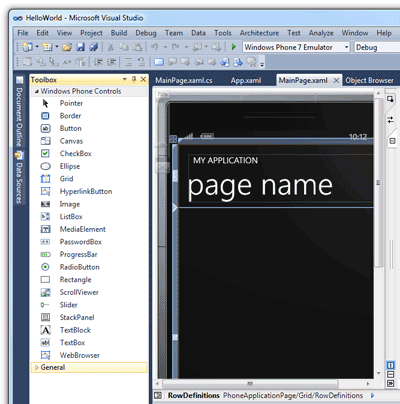
Figure 4. Examining the Toolbox
Populate the UI of the application with the following controls by dragging the controls from the Toolbox onto the design surface of Visual Studio 2010 (see Figure 5):
- TextBlock
- TextBox
- Button
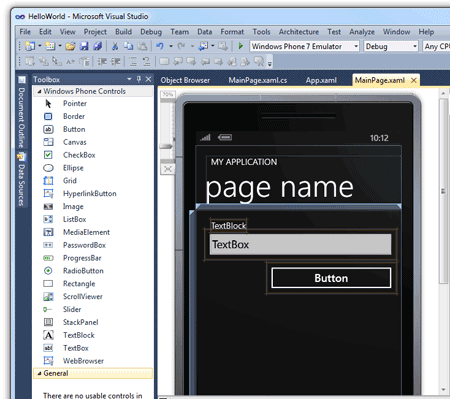
Figure 5. Designing the UI of the main page
You can further modify the UI by editing the content of the MainPage.xaml file directly through the editor:
|
1 2 3 4 5 6 7 8 9 10 11 12 13 14 15 16 17 |
<!--ContentPanel - place additional content here--> <Grid x:Name="ContentGrid" Grid.Row="1"> <TextBlock Height="30" HorizontalAlignment="Left" Margin="36,22,0,0" Name="textBlock1" Text="Please enter your name:" VerticalAlignment="Top" /> <TextBox Height="72" HorizontalAlignment="Left" Margin="21,44,0,0" Name="textBox1" Text="" VerticalAlignment="Top" Width="447" /> <Button Content="OK" Height="72" HorizontalAlignment="Left" Margin="165,122,0,0" Name="button1" VerticalAlignment="Top" Width="303" Click="button1_Click" /> </Grid> |
The UI should now look like Figure 6.
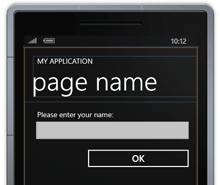
Figure 6.The UI of the application after modification
Double-click on the OK button to switch to its code-behind. Code the following:
|
1 2 3 4 |
private void button1_Click(object sender, RoutedEventArgs e) { MessageBox.Show("Hello, Windows Phone!!!"); } |
Press F5 to test the application on the Windows Phone emulator. Figure 7 shows the application loaded on the Windows Phone 7 emulator. Click the textbox and the virtual keyboard will appear. Type your name and click the OK button. The message box will now appear.
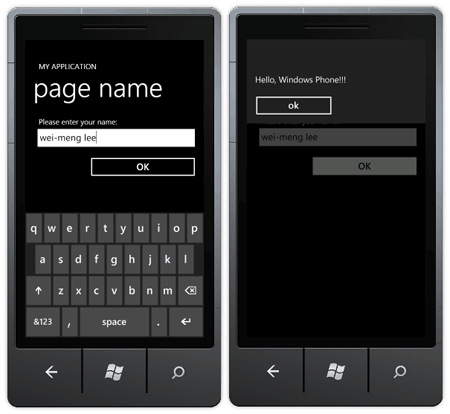
Figure 7. Testing the application
To change the orientation of the emulator, click on the fourth icon on the panel displayed on the right of the emulator. Observe that the application did not turn upright (see Figure 8).
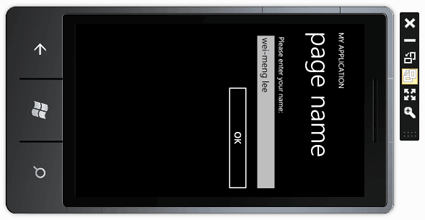
Figure 8. Displaying the emulator in landscape orientation
Orientation Awareness
To ensure that your application supports both landscape and portrait orientations, you need to modify the <phone> element in the MainPage.xaml file with the following:
|
1 2 3 4 5 6 7 8 9 10 11 12 13 14 15 16 |
<phone:PhoneApplicationPage x:Class="HelloWorld.MainPage" xmlns="http://schemas.microsoft.com/winfx/2006/xaml/presentation" xmlns:x="http://schemas.microsoft.com/winfx/2006/xaml" xmlns:phone="clr-namespace:Microsoft.Phone.Controls;assembly=Microsoft.Phone" xmlns:shell="clr-namespace:Microsoft.Phone.Shell;assembly=Microsoft.Phone" xmlns:d="http://schemas.microsoft.com/expression/blend/2008" xmlns:mc="http://schemas.openxmlformats.org/markup-compatibility/2006" FontFamily="{StaticResourcePhoneFontFamilyNormal}" FontSize="{StaticResourcePhoneFontSizeNormal}" Foreground="{StaticResourcePhoneForegroundBrush}" SupportedOrientations="PortraitOrLandscape" Orientation="Portrait" mc:Ignorable="d" shell:SystemTray.IsVisible="True" Height="767" Width="480"> |
Press F5 to test the application again. Rotate the emulator and observe that your application stays upright after the emulator changes to landscape mode (see Figure 9).
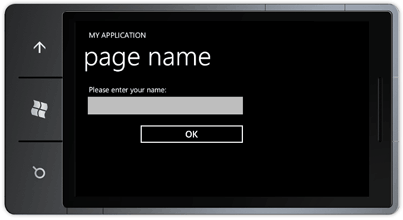
Figure 9. The application now stays upright in landscape orientation
Displaying the Application Bar
The Application Bar is a menu system in Windows Phone 7 that allows you to display icons and buttonson the bottom portion of the screen. It provides users with quick access to an application’s most common tasks.
To display the application bar in your Windows Phone 7 application, go to the MainPage.xaml file and uncomment the two lines as shown below:
|
1 2 3 4 5 6 7 8 9 10 11 12 13 14 15 16 17 18 19 |
<!-- Sample code showing usage of ApplicationBar --> <!-- <phone:PhoneApplicationPage.ApplicationBar> <shell:ApplicationBarIsVisible="True" IsMenuEnabled="True"> <shell:ApplicationBarIconButton x:Name="appbar_button1" IconUri="/Images/appbar_button1.png" Text="Button 1"></shell:ApplicationBarIconButton> <shell:ApplicationBarIconButton x:Name="appbar_button2" IconUri="/Images/appbar_button2.png" Text="Button 2"></shell:ApplicationBarIconButton> <shell:ApplicationBar.MenuItems> <shell:ApplicationBarMenuItem x:Name="menuItem1" Text="MenuItem 1"></shell:ApplicationBarMenuItem> <shell:ApplicationBarMenuItem x:Name="menuItem2" Text="MenuItem 2"></shell:ApplicationBarMenuItem> </shell:ApplicationBar.MenuItems> </shell:ApplicationBar> </phone:PhoneApplicationPage.ApplicationBar> --> |
Press F5 to test the application. You should see the application bar displayed at the bottom of the screen (see Figure 10).
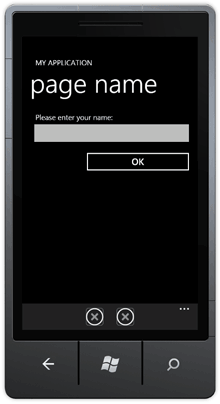
Figure 10. Displaying the application bar in your application
Clicking the three “…” on the application bar will reveal two other menu items (see Figure 11).
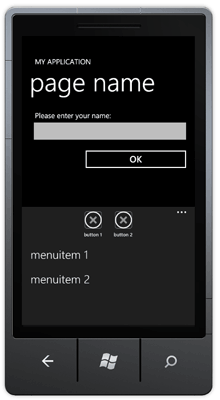
Figure 11. Displaying the two menu items in the application bar
Let’s now write some code so that you can programmatically know when the icons and menu items are clicked. Add the following code in bold to the MainPage.xaml file as follows:
|
1 2 3 4 5 6 7 8 9 10 11 12 13 14 15 16 17 18 19 20 21 22 |
<phone:PhoneApplicationPage.ApplicationBar> <shell:ApplicationBarIsVisible="True" IsMenuEnabled="True"> <shell:ApplicationBarIconButton x:Name="appbar_button1" IconUri="/Images/appbar_button1.png" Text="Button 1" Click="appbar_button1_Click"> </shell:ApplicationBarIconButton> <shell:ApplicationBarIconButton x:Name="appbar_button2" IconUri="/Images/appbar_button2.png" Text="Button 2" Click="appbar_button2_Click"> </shell:ApplicationBarIconButton> <shell:ApplicationBar.MenuItems> <shell:ApplicationBarMenuItem x:Name="menuItem1" Text="MenuItem 1" Click="menuItem1_Click"> </shell:ApplicationBarMenuItem> <shell:ApplicationBarMenuItem x:Name="menuItem2" Text="MenuItem 2" Click="menuItem2_Click"> </shell:ApplicationBarMenuItem> </shell:ApplicationBar.MenuItems> </shell:ApplicationBar> </phone:PhoneApplicationPage.ApplicationBar> |
In the MainPage.xaml.cs file, add the following methods:
|
1 2 3 4 5 6 7 8 9 10 11 12 13 14 15 16 17 18 19 20 21 22 23 24 25 26 27 28 29 30 31 32 33 |
namespaceHelloWorld { public partial class MainPage : PhoneApplicationPage { // Constructor publicMainPage() { InitializeComponent(); } //... private void appbar_button1_Click(object sender, EventArgs e) { MessageBox.Show("This is appbar button 1"); } private void appbar_button2_Click(object sender, EventArgs e) { MessageBox.Show("This is appbar button 2"); } private void menuItem1_Click(object sender, EventArgs e) { MessageBox.Show("This is menu item 1"); } private void menuItem2_Click(object sender, EventArgs e) { MessageBox.Show("This is menu item 2"); } } } |
Press F5 to test the application again. This time, click on each icon/menu items in the application bar and observe the message displayed.
Changing the Application Icons and Splash Screen
Earlier on, I mentioned the use of the ApplicationIcon.png and Background.png files available in your project. Let’s replace them with some newer images as shown in Figure 12.

Figure 12. Using your own images for the application icons
The ApplicationIcon.png must have the size of 62×62 pixels, while the Background.png – 173x173pixels.
Rerun the application by pressing F5 to test the application on the emulator. When the application loads, press the back button to send the application to the background. You will now see that the new icon for the application (see Figure 13). If the new icon does not appear, uninstall the application by clicking on the application icon and holding it for a second, then click the Uninstall option. Rerun the application from Visual Studio 2010.
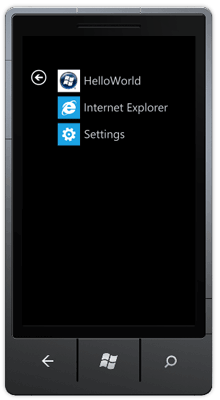
Figure 13. Viewing the application icon
To pin the application onto the Start screen, click on the application icon and hold it for a second. Then select the “pin to start” option. The Background.png image will now appear on the Start screen (see Figure 14).
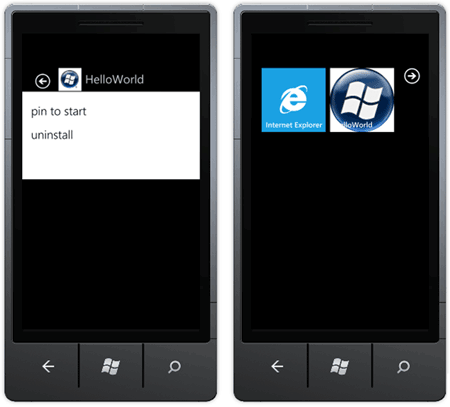
Figure 14. The application pinned to the tile on the Start screen
To change the splash screen, replace the SplashScreenImage.jpg file with an image of your choice, with a resolution of 480×800 pixels. When you rerun the application again, you will see the image displaying momentarily before it disappears to display your main page (See Figure 15).

Figure 15. Displaying the splash screen for your application
Deploying the Application
Everything you press F5 to run your application, Visual Studio builds your application into an XAP file. This file is located in the binDebug (or binRelease) folder of your project. The XAP file is actually a ZIP file containing all the relevant files and resources of your project. Using the Windows Phone Developer Tools, you can install your application directly onto the Windows Phone emulator or device without using Visual Studio. This is useful if you want to install apps onto a machine that does not have Visual Studio.
First, locate the Application Deployment application located in the Start menu of your computer (see Figure 16).
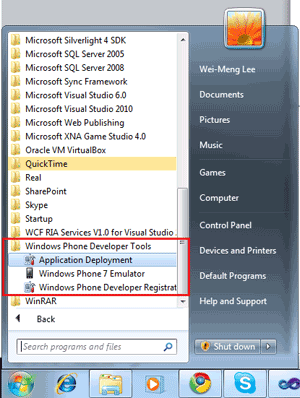
Figure 16. The Windows Phone Developer Tools installed on the computer
Next, select the target – either a real device, or the Windows Phone 7 emulator, and locate the XAP file (see Figure 17). Click Deploy to install the application onto the target!

Figure 17. Deploying applications through the Application Deployment application
Summary
This has been a whirl wind tour of Windows Phone 7 development using Visual Studio 2010. If you have been programming using C# and Visual Studio for the past few years, you should be familiar with the tools. And if you are a Silverlight developer, everything will be much in place. In the next few articles, I will explore deeper and show you how to write compelling Windows Phone application. Till then, have fun!


