Pebble is a smartwatch developed by Pebble Technology Corporation. It is one of the most successful Kickstarter projects to-date and has received significant successes with consumers. The Pebble watch itself comes with a black-and-white e-paper display, and includes several sensors such as magnetometer, ambient light sensor, and an accelerometer. The Pebble watch supports the following types of applications:
- Standalone apps that run on the Pebble itself
- Standalone apps that run on the Pebble itself and can communicate with either an iPhone or Android app
- Sports apps that run on iPhone or Android devices and send the data directly to the Pebble watch
The primary way of interacting with the Pebble is through its four buttons – one on the left (Back button), and three on the right (Up, Select and Down).
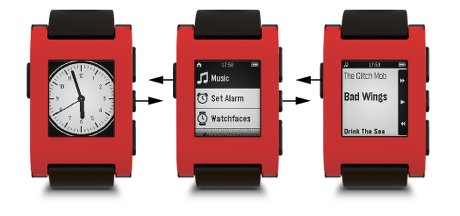
Figure 1. Interacting with Pebble (reproduced from getpebble.com).
Connecting Pebble to a Mobile Device
As the Pebble has no network connectivity options apart from its Bluetooth connections (Classic Bluetooth as well as Bluetooth Low Energy), it must rely on a mobile device to communicate with the outside world. It does so through the Pebble Mobile app. At this moment, the Pebble Mobile app is available on the iOS and Android platforms.
The role of the Pebble Mobile app is:
- Installs applications onto the Pebble
- Provides the Pebble App Store to allow users to browse and install Pebble apps
- Loads and unload apps from the Pebble (as there is a maximum of eight apps that can be installed on the Pebble at any one time)
- Provides a development platform for developers to deploy their applications onto the Pebble
The last point is of interest to developers. For deploying of Pebble apps, the Pebble Mobile app acts as a server, and the developer would deploy the Pebble app through this server. As such, both the mobile device (iOS or Android devices hosting the Pebble Mobile app) and the development machine must be on the same WiFi network.
Preparing your Mobile Device
For this article, I am going to use the iPhone to host the Pebble Mobile app. Once the Pebble Mobile app is installed and paired with your Pebble, go to the Settings page, tap on the Pebble app and turn on Developer Mode (see Figure 2).
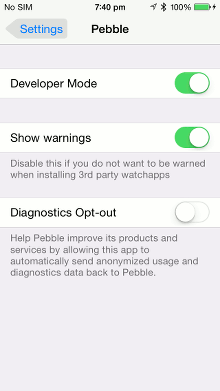
Figure 2. Turning on the Pebble Developer Mode
Once the Developer Mode is turned on, you will now be able to see the DEVELOPER option (see left Figure 3; which is turned off by default). Tap the option and enable it (see right of Figure 3).
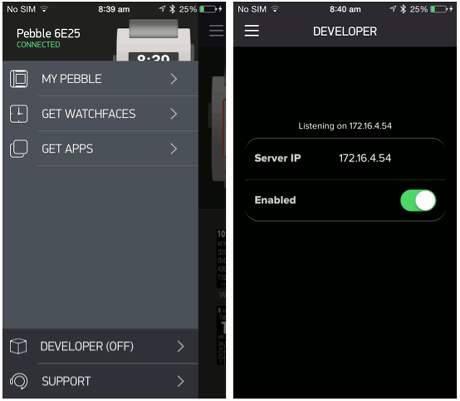
Figure 3. The IP address of the Pebble Mobile app
Once the Developer Mode is enabled, the Pebble Mobile app will now act as the server for you to deploy the application onto your Pebble. Observe the IP address of the server. This is the IP address of your Pebble mobile app (as well as your iPhone).
Developing for Pebble
There are two ways to develop for Pebble:
- Download and install the Pebble SDK from https://developer.getpebble.com/2/getting-started/. However, the SDK is Unix-based and thus requires you to either use a Mac, or use a virtual machine (such as Virtual Box).
- Use the cloud-based CloudPebble (http://www.cloudpebble.net) to develop Pebble apps.
Using CloudPebble
For this article, and for the benefits of readers who do not have a Mac, I am going to use the second option – CloudPebble. CloudPebble is an effort undertaken by Katherine Berry and is not associated with Pebble. However, this is a solid effort to help developers move onto the Pebble platform.
Once you have landed on CloudPebble’s main page (see Figure 4), you need to sign in. You can create a free account, or use your Pebble account (if you have one).
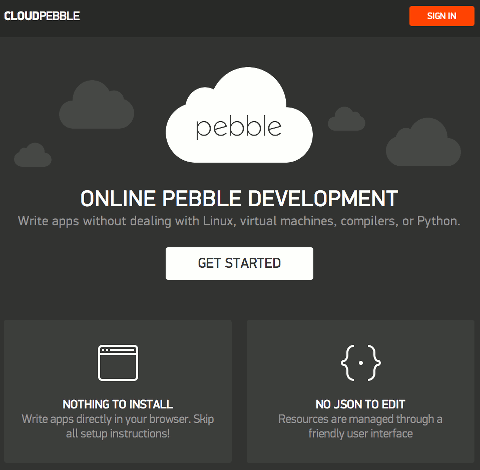
Figure 4. Logging in to CloudPebble
Once you have logged in, click on the CREATE button to create a new Pebble application project. Using CloudPebble, you can let it generate sample code for different types of project. This is something that is very useful for beginning developers. As you can see from Figure 5, you have a list of available project templates that you can choose from.
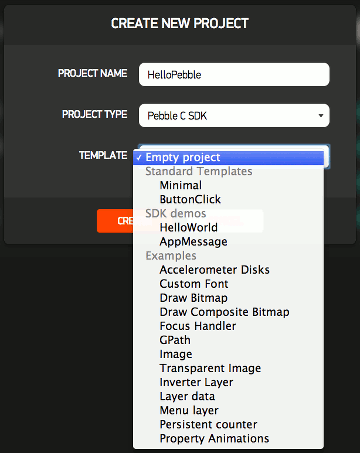
Figure 5. The numerous application templates in CloudPebble
For a start, let’s choose the ButtonClick template. The ButtonClick template creates a Pebble application that allows you to display a message when a button on the Pebble is pushed.
Once the application is created, you will see the screen on Figure 6.
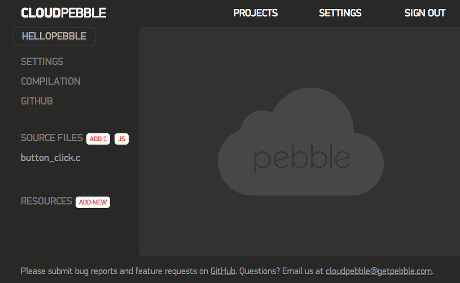
Figure 6. The project created in CloudPebble
Click on the SETTINGS item and you will be able to configure the application’s information. For now, accept the default values (see Figure 7).
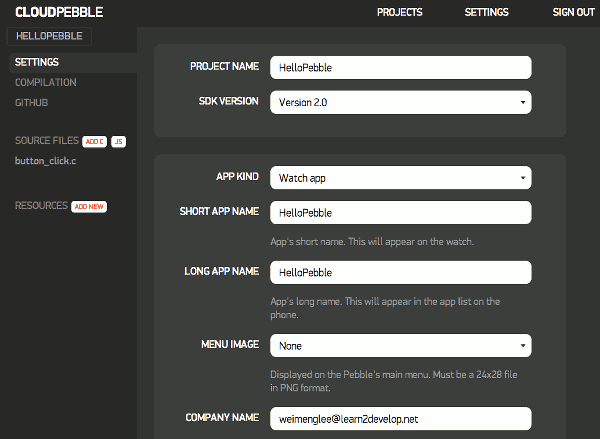
Figure 7. The various settings for the Pebble project
Click the button_click.c item and you will see the code for the application (see Figure 8). The language you will use for Pebble development is C.
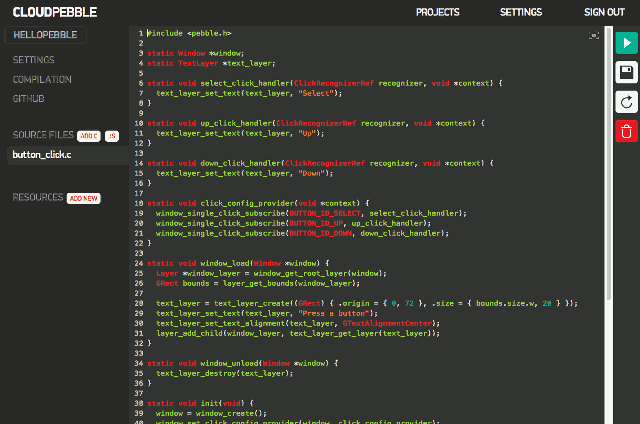
Figure 8. Editing the code for your Pebble app
I have added my comments to the code as shown below so that you are able to see the use of each block of code:
#include <pebble.h>

//---pointers to the Window and TextLayer---
static Window *window;
static TextLayer *text_layer;

//---the click event handler for the SELECT button---
static void select_click_handler(ClickRecognizerRef recognizer, void *context) {
  text_layer_set_text(text_layer, "Select");
}

//---the click event handler for the UP button---
static void up_click_handler(ClickRecognizerRef recognizer, void *context) {
  text_layer_set_text(text_layer, "Up");
}

//---the click event handler for the DOWN button---
static void down_click_handler(ClickRecognizerRef recognizer, void *context) {
  text_layer_set_text(text_layer, "Down");
}

//---the click configuration provider function---
static void click_config_provider(void *context) {
  window_single_click_subscribe(BUTTON_ID_SELECT, select_click_handler);
  window_single_click_subscribe(BUTTON_ID_UP, up_click_handler);
  window_single_click_subscribe(BUTTON_ID_DOWN, down_click_handler);
}

//---called when the user enters the window---
static void window_load(Window *window) {

  //---gets the root layer of the window---
  Layer *window_layer = window_get_root_layer(window);

  //---gets the bound of the layer---
  GRect bounds = layer_get_bounds(window_layer);

  //---creates a new text TextLayer on the heap and init with default
  // values---
  text_layer = text_layer_create((GRect) { .origin = { 0, 72 }, .size = { bounds.size.w, 20 } });

  //---sets the text to display in the TextLayer---
  text_layer_set_text(text_layer, "Press a button");

  //---sets the alignment of the TextLayer---
  text_layer_set_text_alignment(text_layer, GTextAlignmentCenter);

  //---adds the TextLayer onto the Window layer---
  layer_add_child(window_layer, text_layer_get_layer(text_layer));
}

//---called when the user leaves the window---
static void window_unload(Window *window) {
  //---destroys the TextLayer---
  text_layer_destroy(text_layer);
}

static void init(void) {

  //---creates a new Window on the heap and initialize with the default
  // values---
  window = window_create();

  //---sets the click configuration provider callback function on the
  // window---
  window_set_click_config_provider(window, click_config_provider);

  //---sets the window handlers of the Window---
  window_set_window_handlers(window, (WindowHandlers) {
  .load = window_load,
    .unload = window_unload,
  });
  const bool animated = true;

  //---push the window onto the navigation stack using sliding animation---
  window_stack_push(window, animated);
}

static void deinit(void) {
  //---destroys the window---
  window_destroy(window);
}

//---the starting point for your app---
int main(void) {

  //---call this when the app is started---
  init();

  //---enters the app event loop; blocking call---
  app_event_loop();

  //---call this when the app gets killed---
  deinit();
}
Compiling the Application
When you are ready to run the build the code, click on the COMPILATION item and click the RUN BUILD button (see Figure 9).
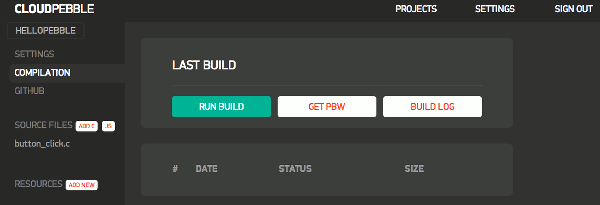
Figure 9. Building the project
If the compilation succeeds, you should now see the name of your iPhone listed (see Figure 10). If not, simply enter the IP address of the iPhone that you have seen earlier. Click the INSTALL AND RUN button and your Pebble application will be deployed onto the Pebble Mobile app, and then finally on to your Pebble watch.
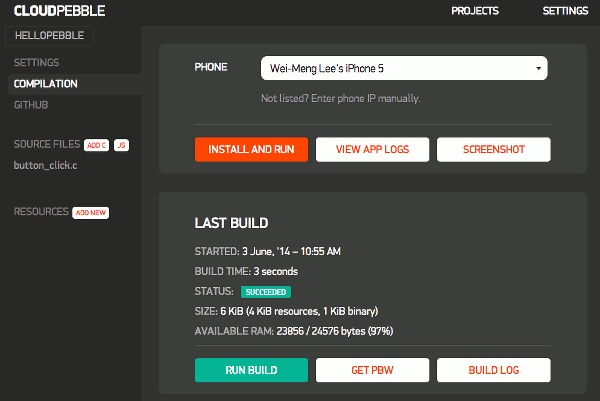
Figure 10. Installing the Pebble app onto the watch
Once the application is installed on the Pebble watch, press each of the three buttons on the right side of the watch and observe the message printed on the watch.
Taking Screenshots
One very cool feature of CloudPebble is that you can also take screenshots of your Pebble. In the same COMPILATION page, click the SCREENSHOT button and it will connect to your Pebble and take a screen shot (see Figure 11).
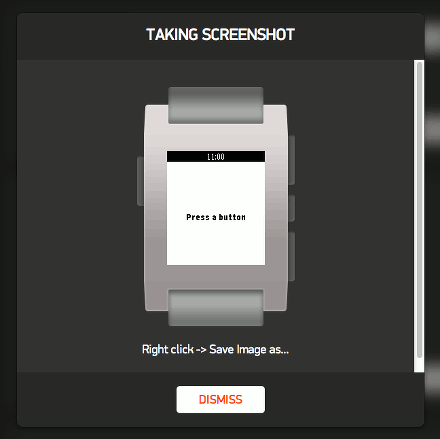
Figure 11. Taking screenshots
Obtaining the Binary of the Application
The Pebble application that you have created is compiled into a .pbw file. This is the deployable binary of your application. To obtain a copy of the .pbw file, click the GET PBW button (see Figure 12) and a copy of it will be downloaded to your computer.
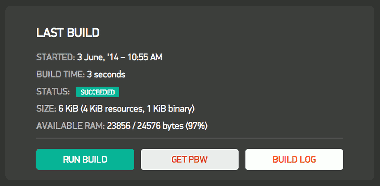
Figure 12. Downloading the .pbw file
To distribute the app to your friends (with Pebble watches), simply email them a copy of the .pbw file and they will be able to download it and install it through the Pebble Mobile app on their mobile devices.
Downloading the Project
CloudPebble projects are saved in the cloud. If you want to save a copy of the project onto your local computer so that you can continue the development using the Pebble SDK, click on the SETTINGS item (see Figure 13) and then click the DOWNLOAD AS ZIP button. A copy of the project will be downloaded onto your computer.
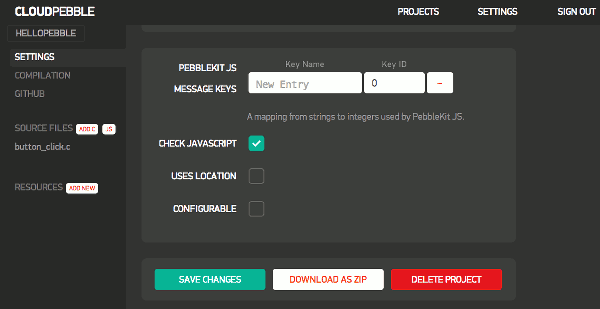
Figure 13. Downloading the project source code
Once the project is downloaded, unzip it and its content will look like Figure 14.
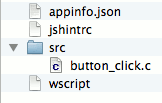
Figure 14. The files inside a Pebble project
Within the project, there is a src folder that contains the button_click.c file. This is the file that you have seen earlier.
The appinfo.json file contains configuration information for the project. This is the JSON file of the configuration that you have modified earlier in Figure 7.
{
    "longName": "HelloPebble",
    "capabilities": [
        ""
    ],
    "uuid": "08d505c5-e202-4b56-8c35-b21ef95f8308",
    "versionLabel": "1.0",
    "resources": {
        "media": []
    },
    "companyName": "weimenglee@learn2develop.net",
    "versionCode": 1,
    "shortName": "HelloPebble",
    "watchapp": {
        "watchface": false
    },
    "appKeys": {}
}
The jshintrc file contains configuration file for Pebble development and you should not need to edit it.
The wscript fille contains the rules to compile a Pebble project. This is meant for the compiler’s user.
Summary
Now that you have gotten started with Pebble programming, the best way forward is to use CloudPebble’s numerous project templates to explore the various types of apps that you can create. You will be able to learn quite a lot just by looking at the code.
Credits
Figure 1 Interacting with Pebble image reproduced from getpebble.com.





Leave a Reply